Tcpshield Registration
Before proceeding, please read the custom Ip address.
To begin, you will need to head over to tcpshield’s website and register for an account here.
After that, we can begin configuring your server(s) to work with tcpshield.
If you have more than one server, you will need to create a proxy server.
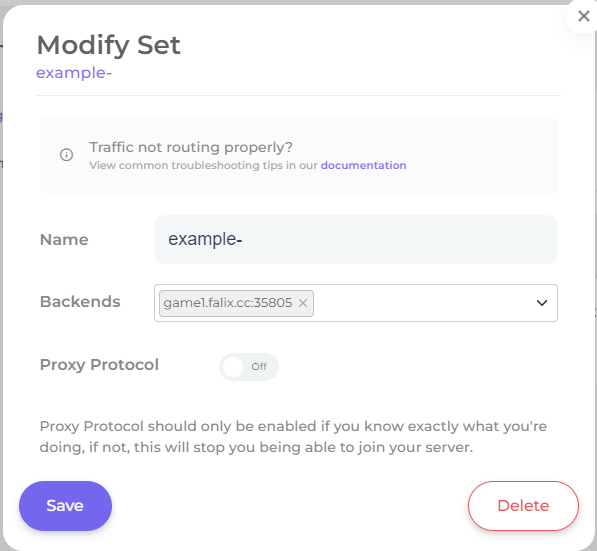
Creating a backend
To do so, click backends or go here.
Then press add set, then type in your server ip as shown below, then press save.
Domain Registration
Now that we have a backend created, we can add the domain. Now navigate to Domains or click here.
Then click Add Domain.
This could be example.com or play.example.com.
Once you type your domain, it will show you a message as shown below.
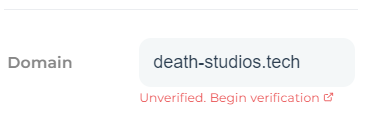
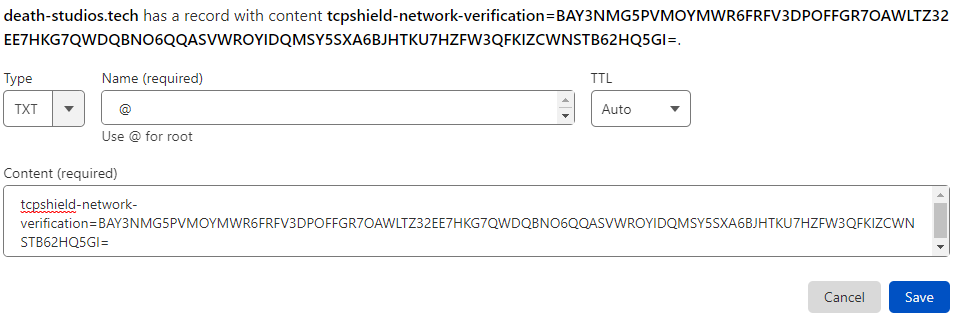
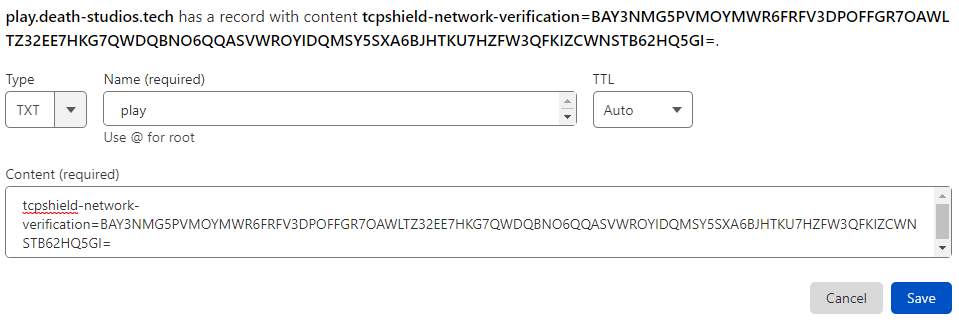
In order to verify the domain to continue, press unverified. To begin verification, you will need to press copy. and add it to your domain’s DNS records.
As shown below, that is what the dns record for a bare domain
here is a example with a subdomain
Now you will have to wait for the DNS changes to take effect.
It may take up to 48 hours for DNS to take effect.
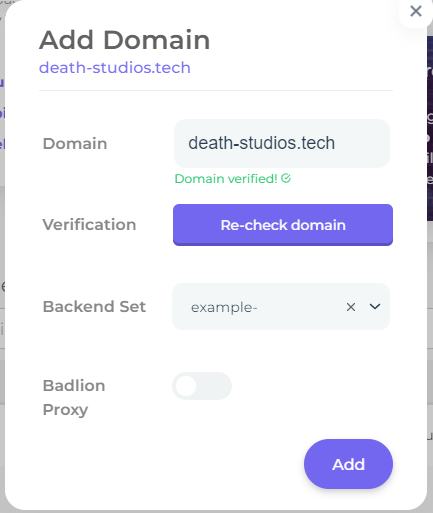
Once the DNS changes take effect, press verify, then select the backend you created earlier, and finally press add, as shown below.
Adding the tcpsheild plugin to your server
Now we need to add the tcpshield plugin to your server. You can download it here.
If you are creating a network, then you need to login to the panel and go to the bungeecord server. If it’s a single server, just add
to that server. If you do not know how to upload files to a server, press here.
You must download ProtocolLib. You can download it here.
Both plugins must be uploaded to the plugins folder to work.
DNS configuration
Now that we have created the backend, added a domain, and added the plugin, we can now setup the DNS records.
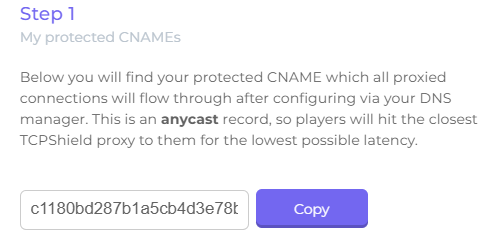
Now you need to remove the DNS records that point to the backend. Now we can create the CNAME record that will
Allow players to join the server with your domain. Now go back here and copy the protected CNAME
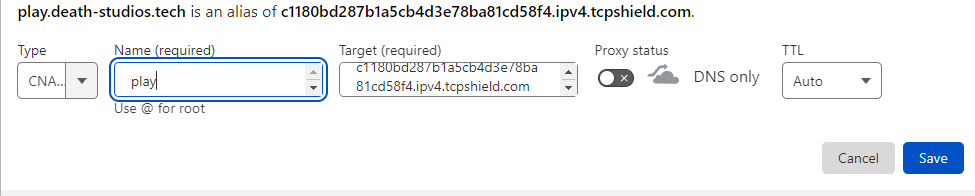
In your DNS manager, for target, put the protected CNAME record and for name, put what you want the subdomain to be, then press save.
DNS can take up to 48 hours to take effect.
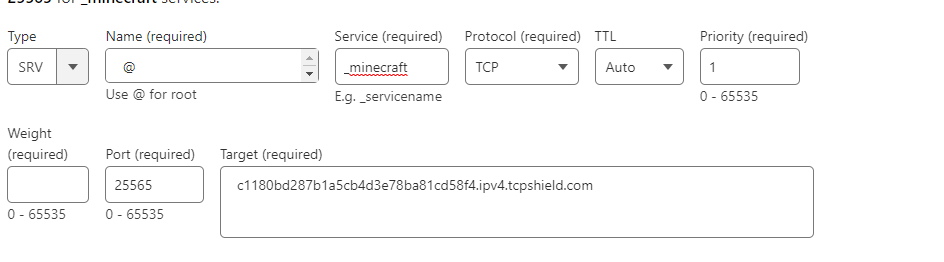
If you want to allow players to join without a subdomain, read below.
create an SRV record. Points to your protected name follow the table below.
| Name | Service | Protocol | Priority | Weight | Port | Target |
|---|---|---|---|---|---|---|
| @ | _minecraft | TCP | 1 | 1 | 25565 | Your Protected Cname |
The port must be 25565.
Here is an example:
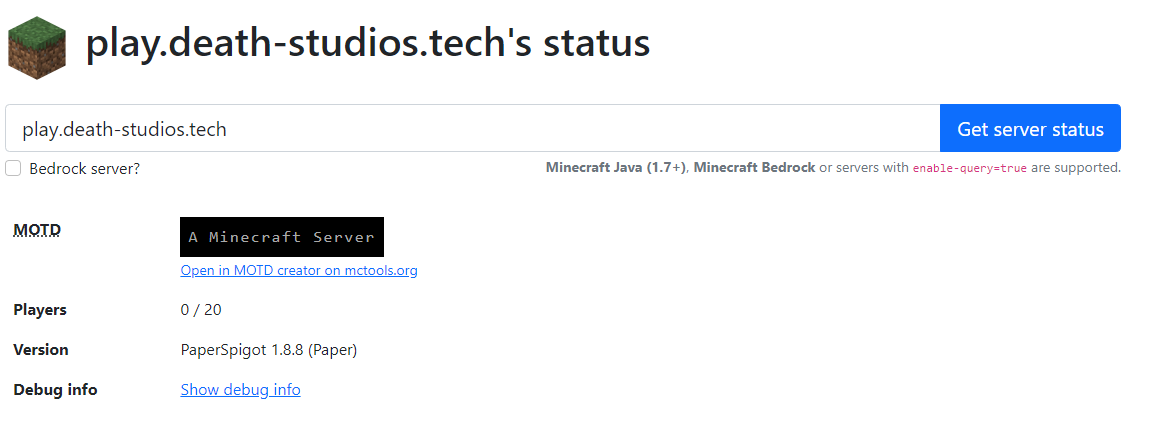
now to confirm that it works go here and search your servers custom ip
if it works it will show the final on both ip’s